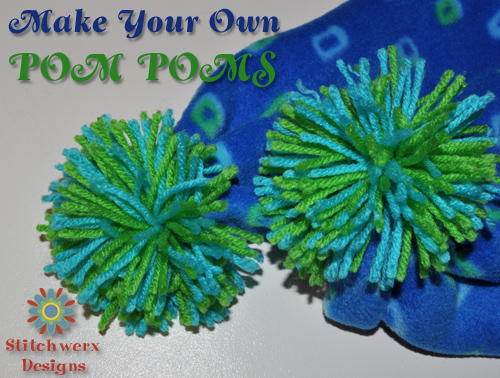
 My daughter recently taught me this fabulous way to Make Your Own Pom Poms! Until now, my pom poms were not that great. I just wound the yarn around 3 or 4 fingers, tied it in the middle and clipped the ends. Sad, oh, so very sad, indeed! Now my Pom Poms are excellent!
Materials Needed:
- Cardboard
- Scissors
- X-Acto knife (small utility knife)
- Yarn
- Something round to draw a circle (or a compass will do)
Let’s Get Started!
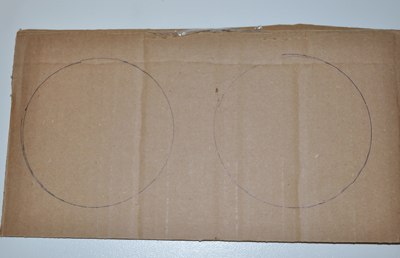
Draw Circles on Cardboard
Use a compass or circular object to draw two pom pom circle templates. Things that work great for tracing include: a solo cup, small tupperware container, or coffee cup.
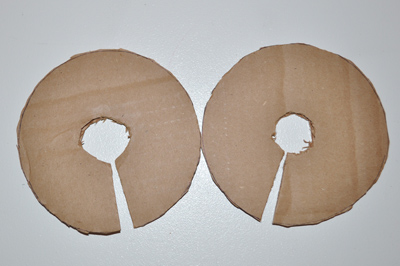
Cut Templates as Shown
Cut these templates out, then cut a slit in the side and a smaller hole in the center. I used my handy X-Acto knife to cut the center holes because it is much easier than using scissors. This is a good time to cut a piece of yarn about 6-8″ long. Keep this handy for tying your pom pom.
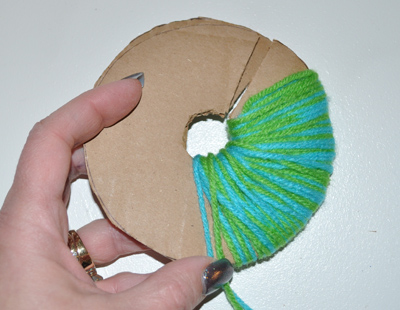
Wind Yarn Around Templates
Next I sandwiched my two circle templates together and wound my yarn as shown around and around, using the open slit to more easily get it in place. Keep winding until it is pretty full all around. The more you wind, the fluffier the pom pom.
The Tricky Part!
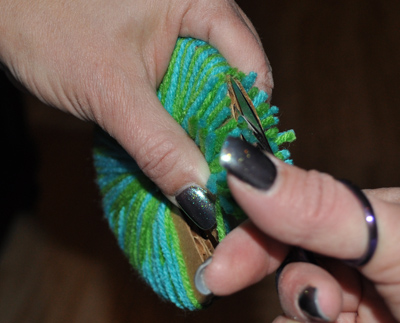
Hold Firmly in Center and Cut Yarn Around Outside Edge
Hold the yarn/templates firmly in the center while cutting all around the outside edge. You are cutting in the groove between the two cardboard templates. Be careful not to let the yarn slip off while you thread your yarn tie between the two templates. (It helps to have another set of hands if someone is available, but I was able to do this by myself.)
Insert Yarn Tie Between Two Templates
Insert your Yarn Tie between the two templates.
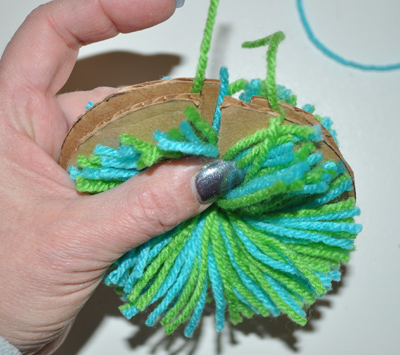
Tie Yarn A Couple of Times
Tie the yarn and pull tight to secure your pom pom in the center. Tie it a couple of times to get it secure.
Close Up View of Tied Yarn
Once you tie the center yarn securely, you can pull your pom pom loose from the template. This is also where the slit comes in handy.
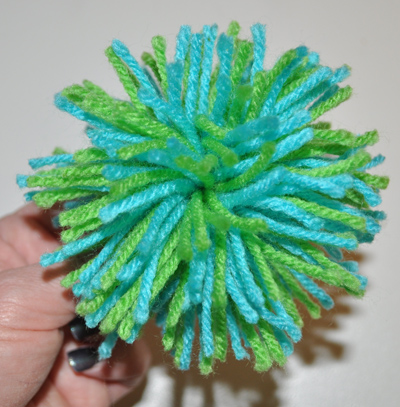
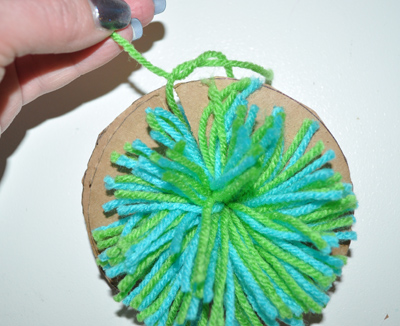
Finished Pom Pom
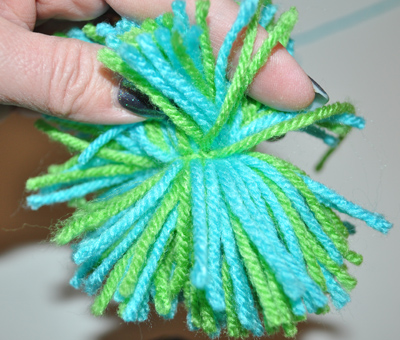
Trim up straggly pieces of yarn to give your pom pom a nice even shape. Here is a finished Pom Pom! Depending on the type of yarn and the amount you wind onto your templates, you can get a variety of pom pom looks.
What can you do with these pom poms you ask? There are all sorts of uses including putting them on knitted booties, hats or scarves. Have fun making your own Pom Poms!
Everyone loves a party! Look for me at these LINKY PARTIES!