
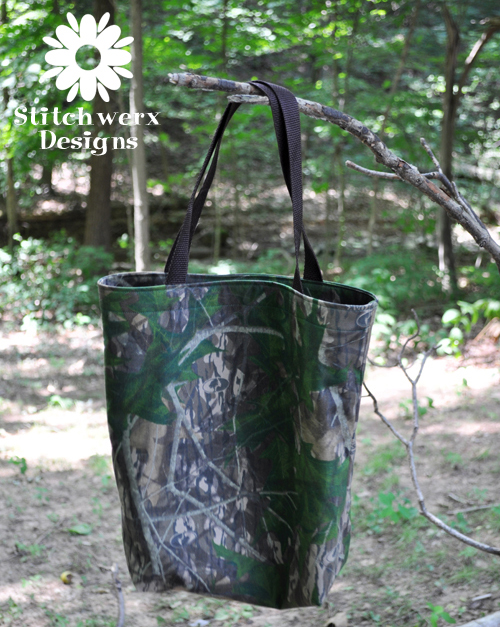
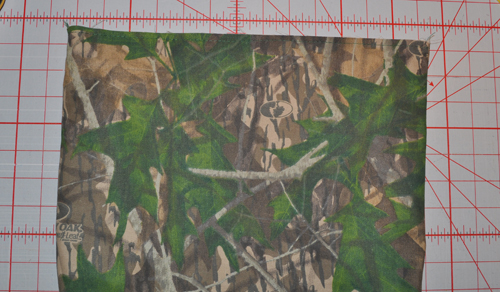
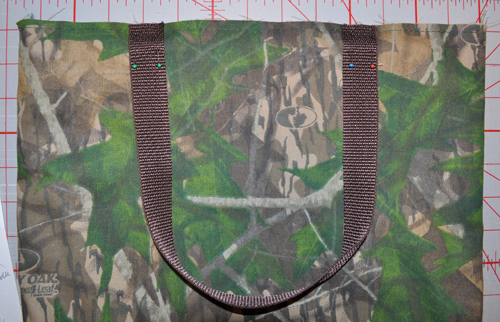
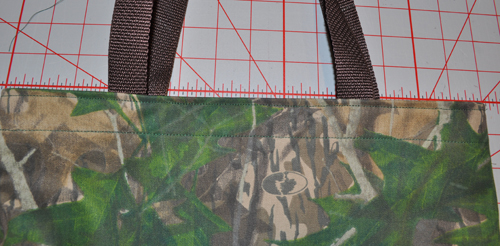
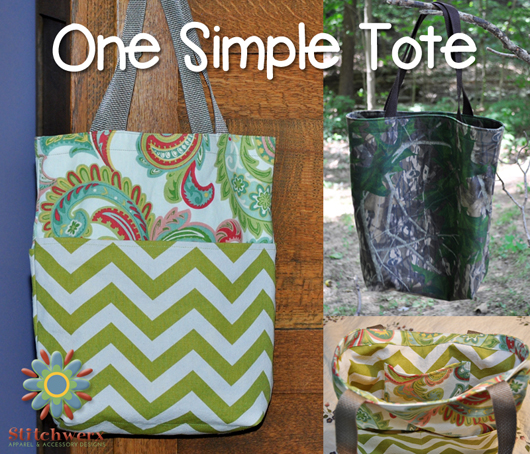
 I recently made this camo tote for a friend’s birthday. My hubby makes excellent wine, so our gift was several bottles of wine in this camo tote. Our friend loves Joe’s wine and is a real outdoorsman, so this went over really well! Of course, you can use this pattern to make all sorts of reversible totes in varying sizes and fabrics.
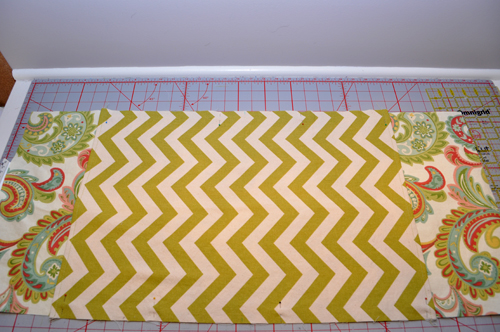
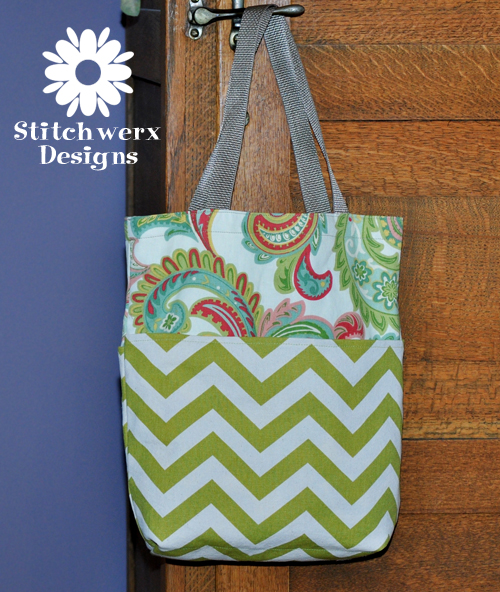 Here is a Floral/Chevron Tote I made (with added pockets) using fabric I had in my stash. I love the way it turned out. Because it’s lined, it’s reversible. I still haven’t decided which way I like the best! Instructions for adding pockets are below (after the original tote instructions).
The measurements given below make a tote 10″ Wide x 3.5″ Deep x 14″ Tall. You can easily change the dimensions to make a tote exactly the size you want.
My formula for getting the measurements:
Fabric Width: tote width+tote depth+1″(seam allowances)= fabric width (outside & lining fabrics).
Fabric Height: (2x tote height)+tote depth+1″(seam allowances)= fabric height (outside & lining fabrics).
Facing band: (2x tote width)+(2x tote depth) + 1″(seam allowances)= facing band width. Facing band height is 2″ tall.
FABRIC & MATERIALS
 The best fabrics for your tote are heavier woven cottons such as Duck, Twill, Denim or Corduroy. 100% Quilting Cotton will work as a lining or both outside and in, but I would recommend using an interfacing to give your tote more strength if you use lighter weight fabrics.
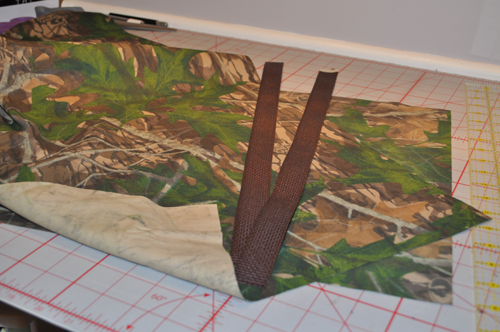
I used 1″ wide Nylon Webbing for my handles on the Camo Tote, but you could make fabric handles if you like that look better.
CUTTING
Grainline runs with the Height.
Outside Fabric:
Cut 1 piece 14.5″ wide x 32″ tall.
Cut 1 piece 28″ wide x 2″ tall.
Lining Fabric:
Cut 1 piece 14.5″ wide x 32″ tall.
Handles:
Cut 2 pieces of 1″ wide Nylon Webbing 19″ long.
CONSTRUCTION
Seam Allowance is 1/2″.
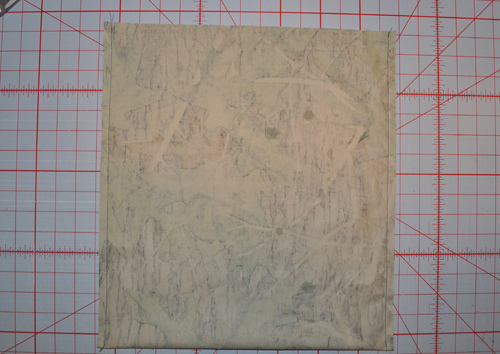 Fold Outside Fabric in half right sides together, stitch each side.
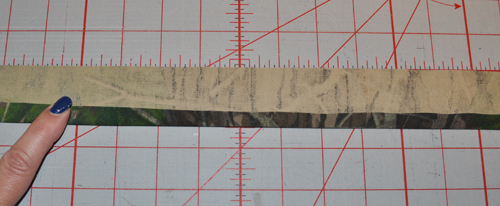
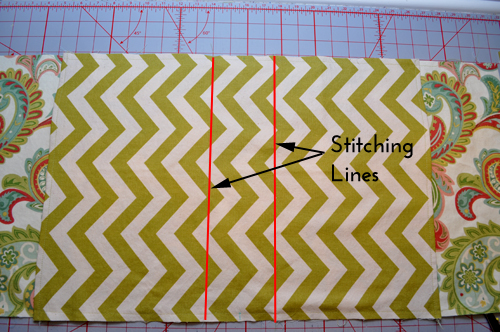
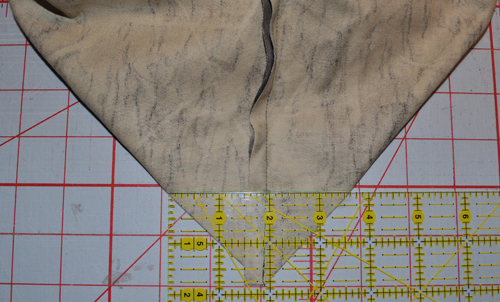 Pull the bag open and lay flat with one side seam centered as shown in photo. Use a fabric pen to draw a straight line across right where it is 3.5″ wide.
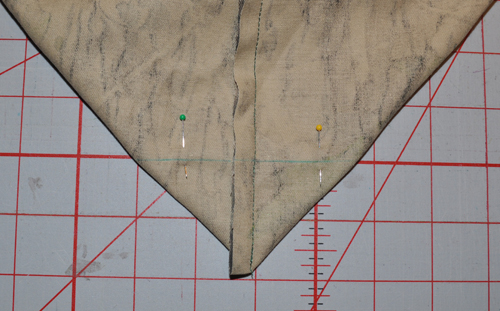 Place a couple of pins to hold it and stitch across on that line. Do the same on the other side.
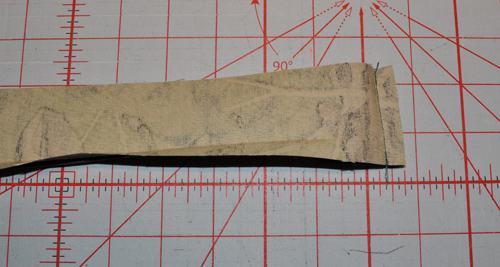
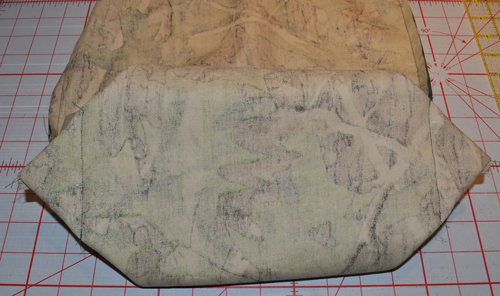 This is what it should look like from the bottom.
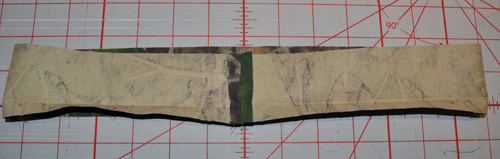
 I pressed mine under and flat like this.
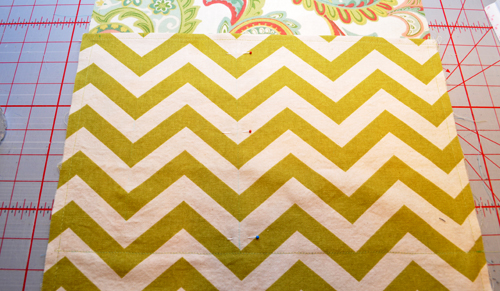
Repeat all these steps using the Lining Fabric.
 Place the lining into the outside so they are WRONG SIDES TOGETHER. Baste the outside and lining sections together at the top raw edges about 1/4″ from top edge.
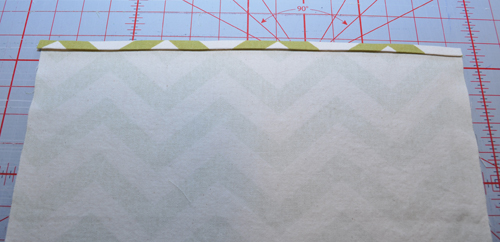
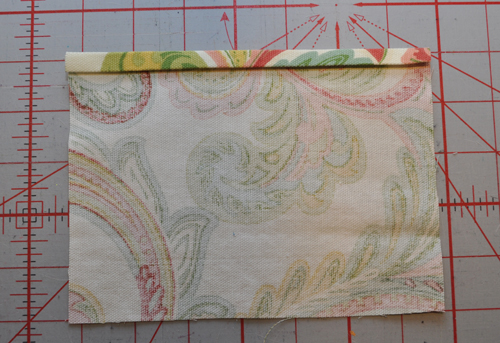
 Take the long fabric strip (this is the top facing) and press one long raw edge under 1/2″ to the wrong side.
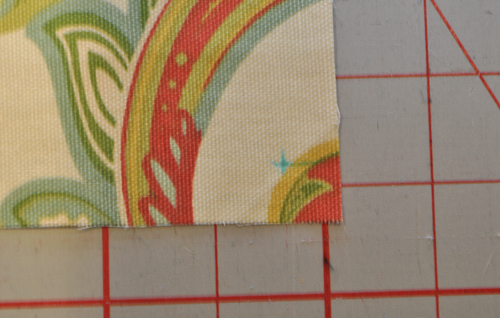
 Stitch the strip right sides together on short side. Make sure you unfold where you pressed it under on the long edge when you sew here.
 Press that short seam open.
 Pin one nylon strap to one side of your tote at the top edge. I placed mine so each outside edge of the strap was about 3″ from the side of the tote. The important thing is to make sure the handles are centered. Repeat with the remaining strap for the other side.
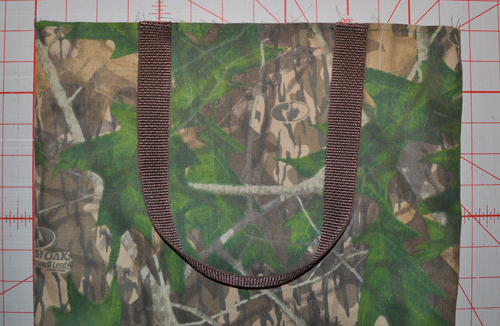 Baste these in place 3/8″ from top edge.
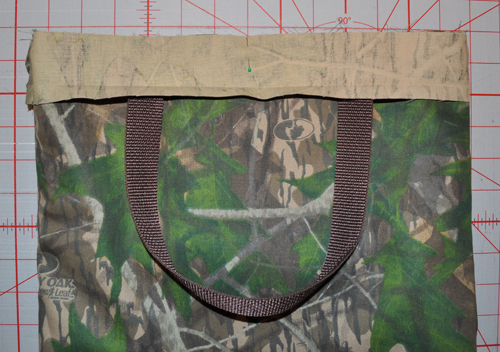 Place the Facing Band right sides together with the outside of the tote, aligning the top raw edges and the facing seam with one tote side seam. Make sure you place the Facing so the UNPRESSED EDGE is at the top. Pin in place all around. The nylon straps are sandwiched between the facing and the tote. Stitch in place all the way around.
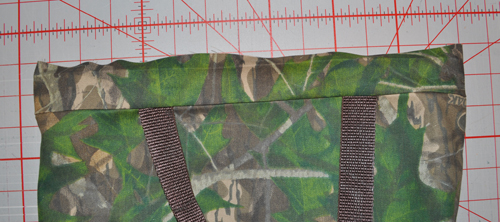 Fold the Facing up and to the inside of the tote, folding that facing pressed edge under. I like to press the top edge of the tote here too so you get a crisper edge.
 Pin in place, then stitch facing down as shown.
 I used one row of stitching about 1/8″ from top edge and another row 3/4″ from the top edge.
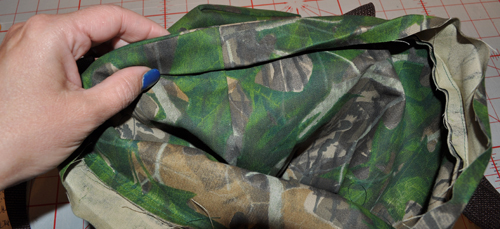
Your One Simple Tote is Complete!
OTHER IDEAS
How About Outside Pockets? Here’s How:
I wanted my outside pockets 9″ tall. The width of my outside fabric for this tote is 14.5″ wide, so that is the width I want to cut my pocket. For the height, I used this formula: (2x Pocket Height) + Tote Bottom Width + Pocket Hem. So that would be (2×9)+3.5+1= 22.5″. So to have 9″ tall pockets on each side of my tote, I cut my pocket fabric 14.5″ wide x 22.5″ tall.
 Press the raw edge of your pocket fabric (on the 14.5″ side) under to the wrong side 1/4″, then fold again 1/4″ and press. Top stitch this down a scant 1/4″ from the edge. Do this on each end.
 Find the center of your outside fabric by folding in half. Draw a line with a fabric pen to mark the center. This mark shows the center of the BOTTOM of your tote. Fold your pocket fabric and mark the center of it the same way.
Place the pocket fabric on top of the outside fabric both RIGHT SIDES UP aligning the center marks. Pin on each side and baste pocket fabric to outside fabric about 1/4″ from each edge.
The bottom of your tote is 3.5″, so you want to add stitching along each side to keep your pocket in place (and keep things from sliding through to the bottom).
 Lay your fabric out flat and measure 1.75″ from each side of the bottom center mark. Draw lines with a fabric marker. Stitch across on these lines.
 This will give you stitching 3.5″ apart right along the bottom edge of your tote.
 If you would like to divide one or both sides of your pockets vertically, mark where you would want that with a fabric pen, then stitch it down. I stitched a divider line on one pocket to make a smaller compartment for a water bottle or other goodies I might be toting!
Now you can proceed with making your tote per the normal directions.
Want an Inside Pocket? Let’s do it!
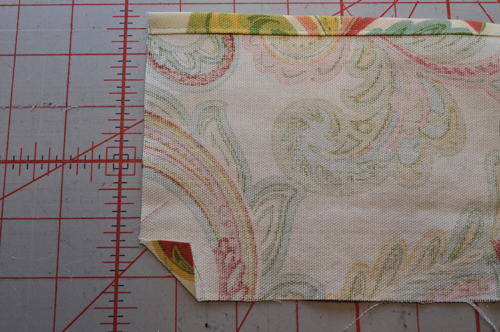
Adding an inside pocket is also pretty simple. First decide how big you want your inside pocket. I wanted one 6″ wide x 5″ tall. I added 1/2 all around for the seam allowance and top hem which means I cut my inside pocket fabric 7″ wide x 6″ tall.
 Hem the top edge by pressing under 1/4″ then 1/4′ again, then top stitch a scant 1/4″ from the edge. I like to make mitered corners on my pockets so this is how I did my other three sides.
 Mark a dot in each bottom corner 1/2″ from each edge.
 Fold the bottom corner to the wrong side right on this dot and press. Unfold and you will see the line where your pressed it.
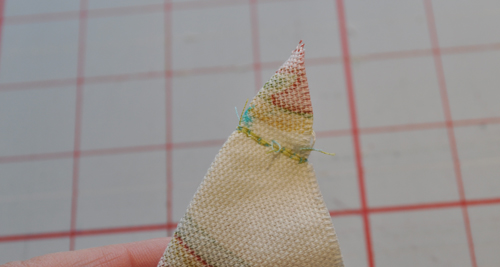 Fold right sides together as shown and sew across that line. Make sure you back stitch to hold it in place.
 Trim the seam allowance close to the stitching. Do this on each bottom corner.
 Now press the 1/2″ seam allowance to the wrong side (you will pop that stitched corner right side out as your turn the seam allowance).
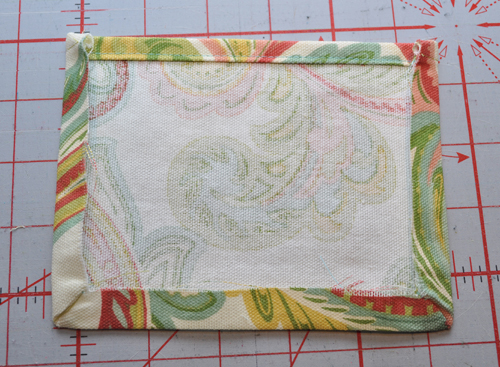
 Pin your pocket to your tote lining where you would like it. Remember there is a facing that folds down 1″ to the inside, so don’t place it up too high. I centered mine horizontally (by marking the centers and aligning). Vertically, I placed it so it would be 2″ from the finished top edge (2.5″ from the top raw edge). Stitch close to the 3 pocket edges to hold it in place.
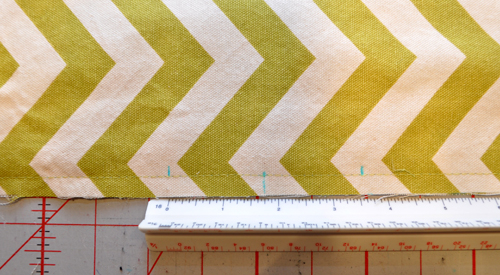
This is the point where I noticed I cut my chevron fabric a tad crooked (Drat!), but I did not have enough to recut, so my tote is {slightly} imperfect! Oh, well, I love it anyway!
Now you can proceed to make your tote per the normal directions.
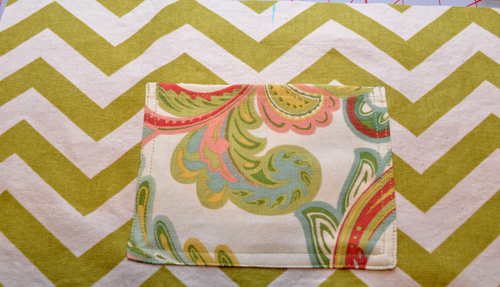
 Here are some other views of my finished floral/chevron tote with both outside and inside pockets.
 This is a great base pattern to create a variety of totes. Not only can you add pockets (inside and out), you can also add embroidery or other embellishments to create your own one-of-a-kind tote! If you make a tote with this tutorial, I would love to see! Please feel free to share your finished project photos on my Stitchwerx Designs Facebook Page!
Happy Sewing!
You can find me at these fabulous Linky Parties!


Pingback: Frozen Inspired Part One: Snow Princess Anna Dress, Free Templates + A Giveaway! | Stitchwerx Designs
Pingback: Frozen Inspired-Ice Princess Elsa Dress and Face Painting | Stitchwerx Designs