 For the past several years I have made my dear granddaughter a princess dress for Halloween & her birthday (which follows in December). Now I have two dear granddaughters, so this year it’s two princess dresses!
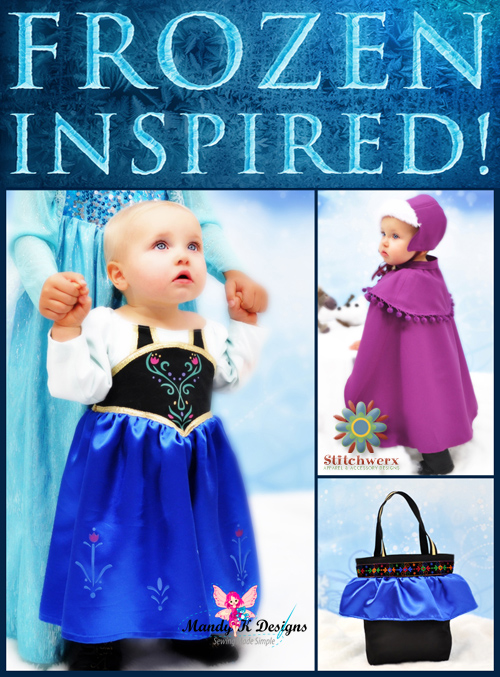
Like so many, we have been inspired by the recent “Frozen” movie. Going along with that, my post today is about creating your own Snow Princess Anna-Inspired Dress. We also have some goodies for you, so be sure to read all the way through!!
 I used the Princess Party Dress Pattern by Mandy K Designs as the base for both my princess dresses this year. I love this pattern for several reasons:
- Sizes 12 months to 12 years
- Clear instructions with plenty of photos
- Easy to sew
- Easy to alter for different princess looks
- Elastic back for longer wear/easy fit
 Mandy K Designs is having a Limited Time Sale on this pattern of only $5 now through September 30, 2014. You can purchase that here: Princess Party Dress Pattern.
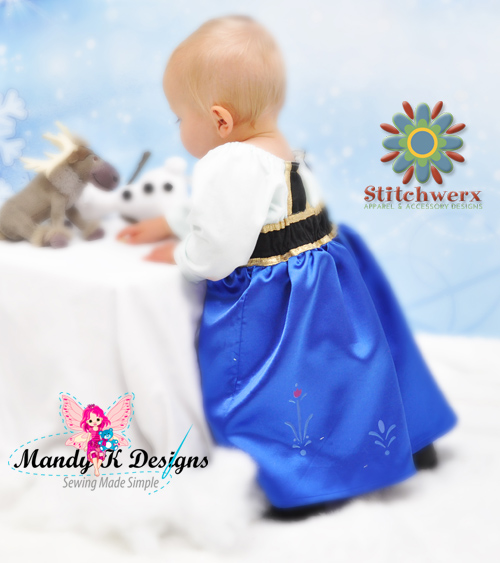
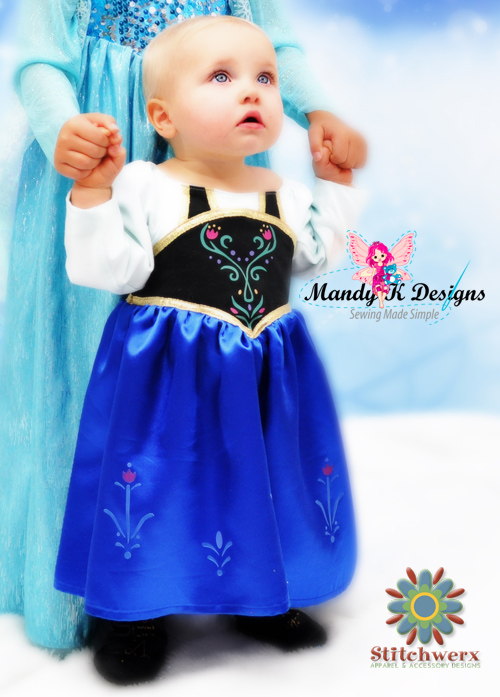
SNOW PRINCESS ANNA-INSPIRED DRESS DETAILS
 For this dress, I wanted to use Scandinavian Motifs on the bodice and skirt similar to those on the dress Anna wears in the movie, so I drew my own. There are outline and full color versions. These are FREE (yes, FREE) templates for your personal use. Please don’t take my artwork and resell it!
Here are links to download these FREE FILES (individually) in PNG format:
- Anna Dress Bodice Template-Outline
- Anna Dress Bodice Template-Color
- Anna Dress Skirt Template-Outline
- Anna Dress Skirt Template-Color
- Anna Dress Single Tulip Template-Outline
- Anna Dress Single Tulip Template-Color
- Anna Boot Template-Outline
- Anna Boot Template-Black
Here is a link to download these FREE FILES, PNG Format (compressed into one ZIP File):
Even though these are designed to fit the Princess Party Dress Pattern, they could be used with just about any dress pattern. I used my Silhouette Cameo Software and ink jet printer to print the color motifs onto iron-on sheets for dark fabric, then cut them with my Cameo cutter.
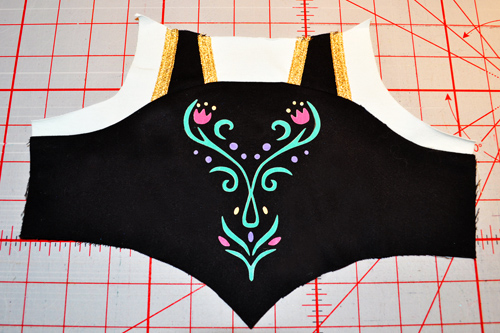 This iron-on stuff can be a bit tricky to use, but you will have good results if you take your time and follow the manufacturer’s instructions. I practiced on some scrap fabric first. You could also use the outline versions to cut stencil templates instead of doing the iron-ons.
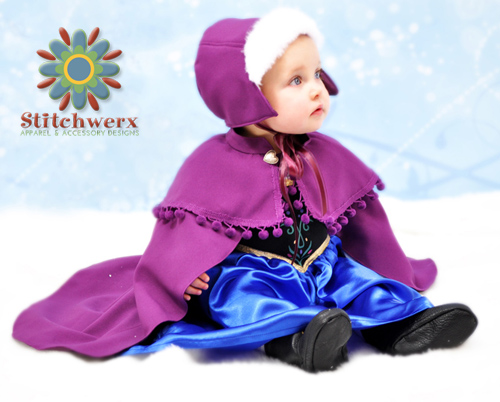
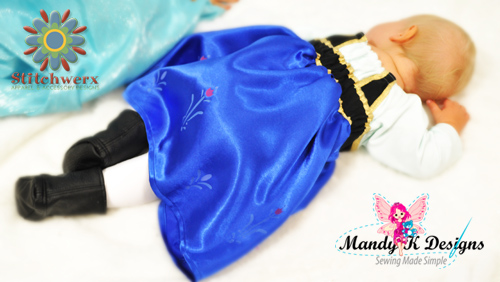
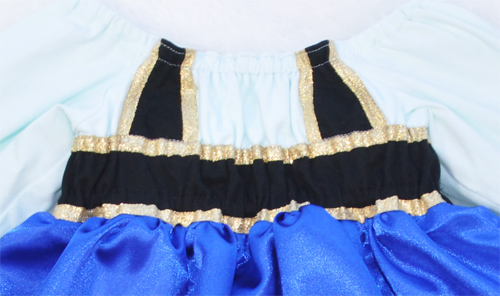 Since Anna’s dress has a black vest over a blouse, I wanted to recreate this look with my dress. This meant altering the pattern just a bit. It was very easy to do: I cut black shoulder straps and stitched those onto the top section of the dress on the front and back. To complete the vest look, I used 1/2″ wide metallic gold ribbon as trim.
SNOW PRINCESS HAT & CAPE
Anna has a lovely hat and cape she wears to keep her warm in the Scandinavian winter weather. Our Snow Princess look would not be complete without these!
 I used one of my own pattern designs, the S138 Joyce Ann Bonnet, to make my Scandinavian Style Snow Princess Hat. This pattern comes in 8 sizes to fit heads 15″ up to 22.75″. It has three views (a bonnet with two brims styles, and a fur-brim cap similar to Anna’s). The fur-brim version (View C in the pattern) worked perfectly for the Nordic Winter Cap look I wanted.
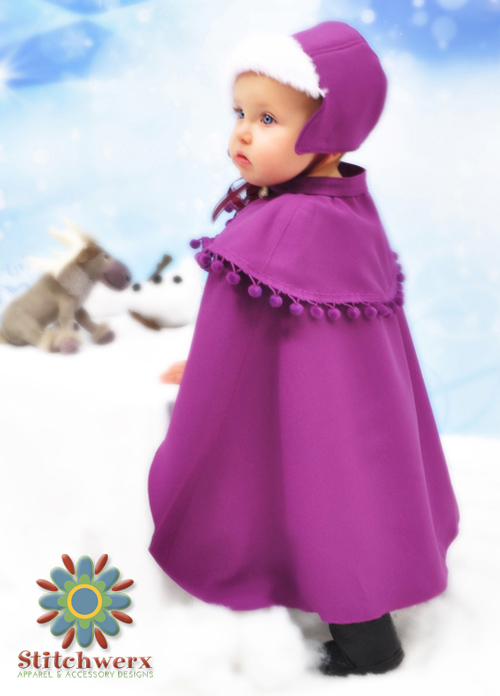 I used my pattern, the S139 Traveler Cape, to sew the cape for my outfit. This cape comes in 5 sizes to fit 12M to 10Y. I added the pom pom fringe around the shoulder cap and some cute little heart buttons for a finishing touch.
 Today through Tuesday, September 30, 2014, you can purchase the Hat & Cape Pattern Bundle for $10 (35% savings off the individually priced patterns) in the Stitchwerx Designs Etsy Shop. These patterns are not just for making a Snow Princess Costume, you’ll get good use from them making garments for everyday wear.
SCANDINAVIAN BOOTS
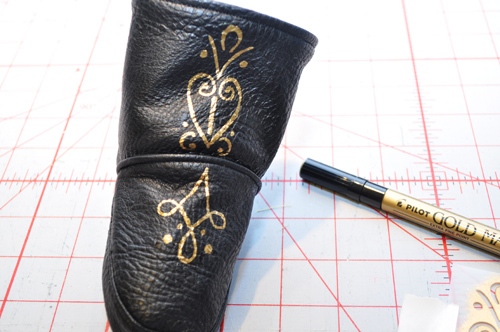 Download the Boot Motif Template to stencil your own Anna-style Scandinavian Boots. You can transform plain black boots using the FREE Scandinavian Boot Motif Template and metallic gold paint or pen.
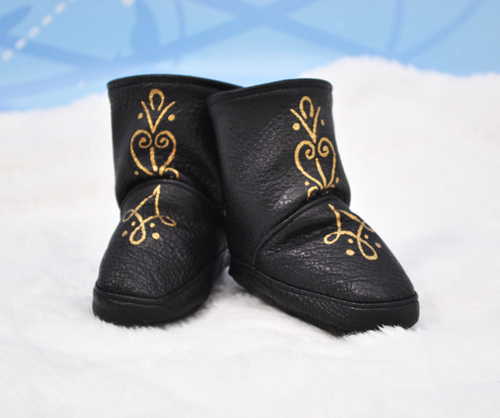 My granddaughter has tiny size 4 feet, so I decided to make boots for her. I am still working on grading and releasing a boot sewing pattern. I’ll be sure to post all about it once it comes to fruition!
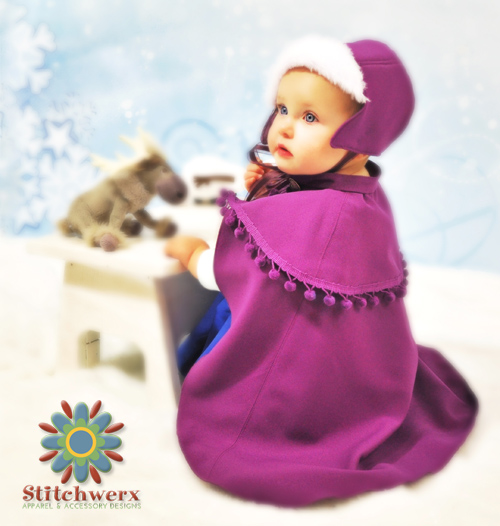
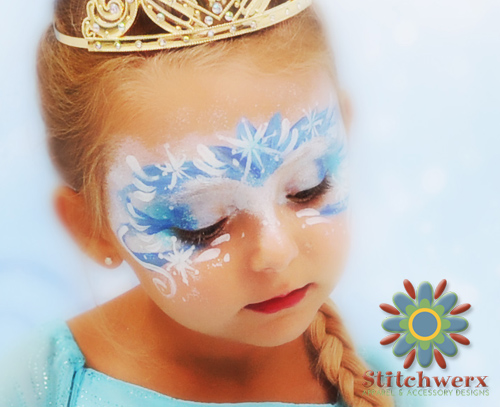
THE PHOTO SHOOT
 We had a great time photographing the girls in their Frozen Inspired Princess Costumes. I LOVE this Frozen Ice Castle Photo Backdrop from Artful Life Designs! It is available for purchase in sizes ranging from 3′ x 3′ up to 5′ x 7′. This is the perfect photo back drop for any “Frozen Inspired” Birthday Party, Event or Photo Shoot!
 It’s exhausting being a Snow Princess!
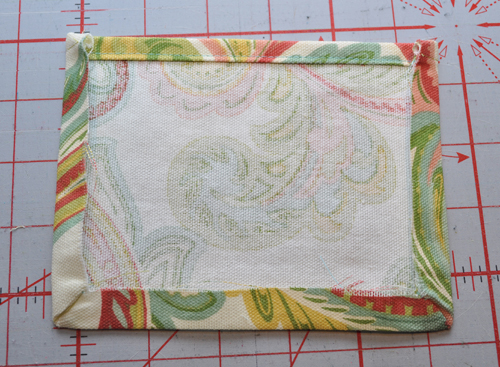
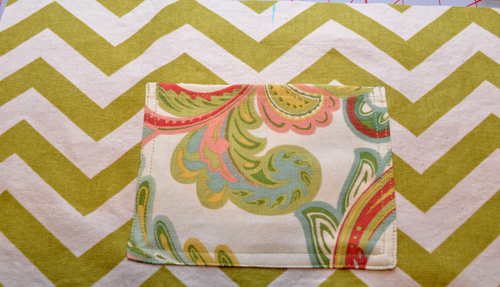
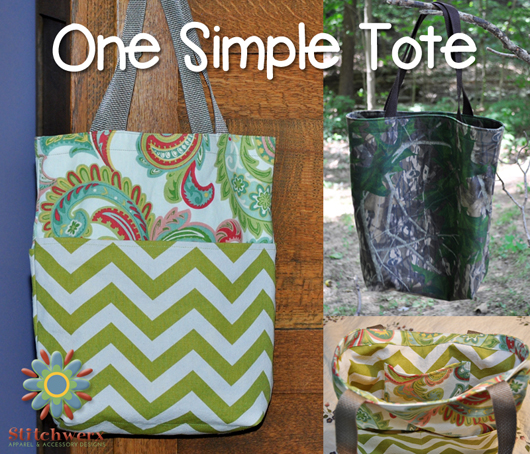
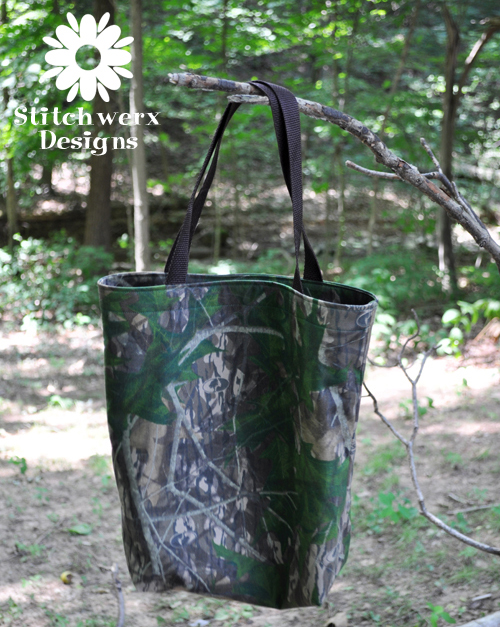
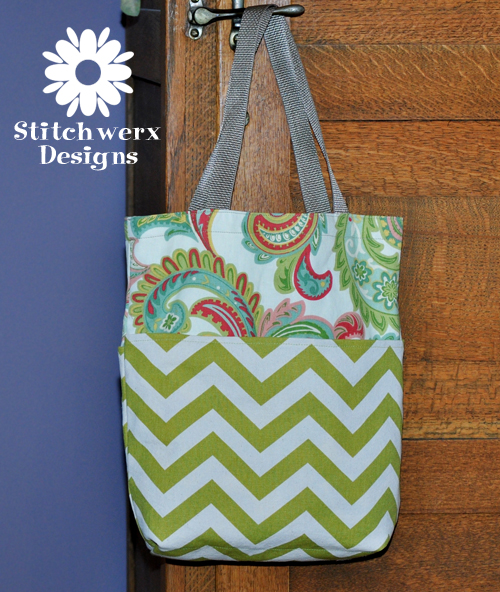
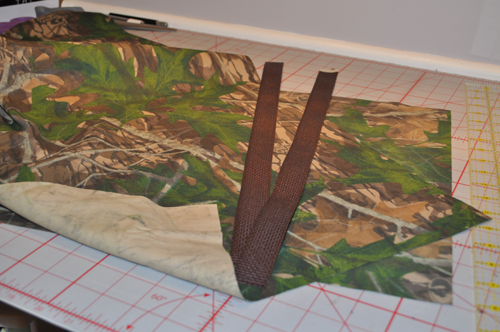
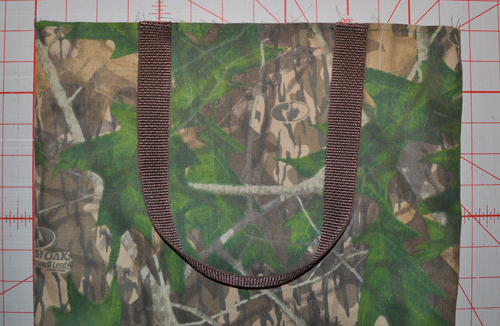
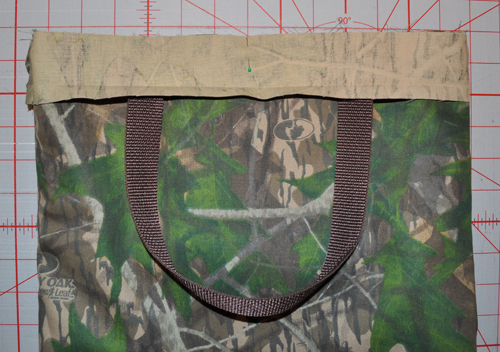
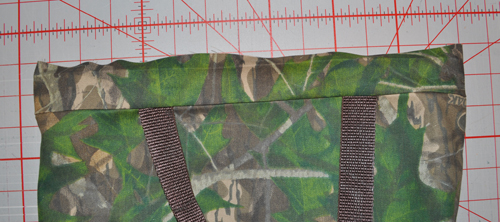
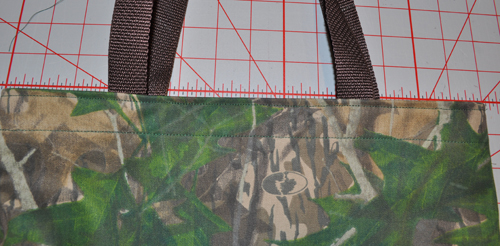
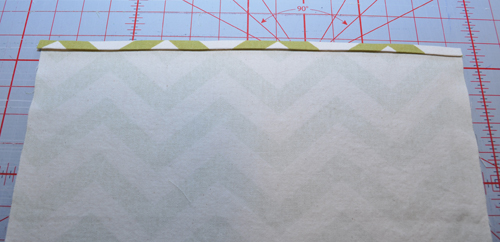
TRICK OR TREAT TOTE BAG
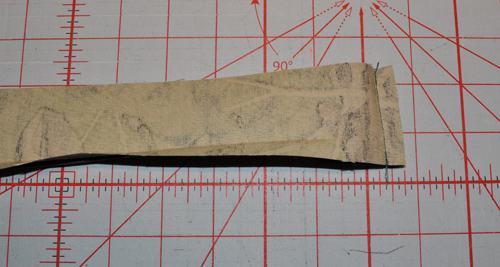
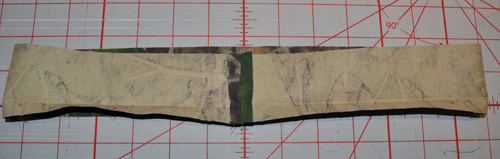
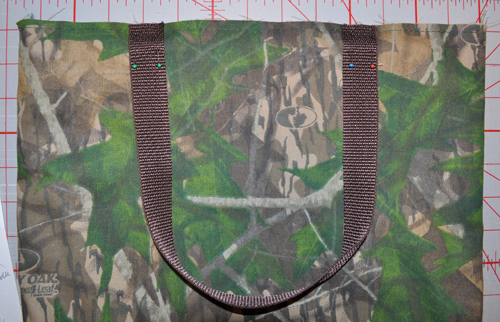
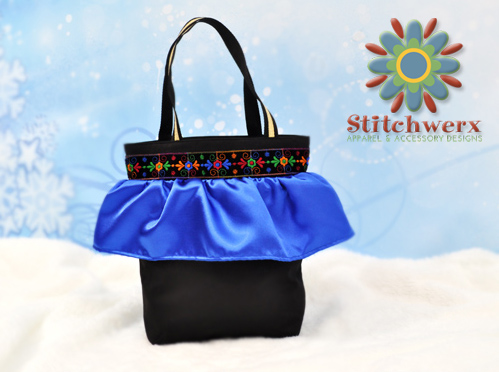 No Snow Princess Costume would be complete without a Trick-or-Treat Tote Bag. I modified my FREE One Simple Tote Tutorial (by adding ruffles) to make quick and easy Frozen Inspired Trick- or-Treat Tote Bags.
THE GIVEAWAY!
Yes, there is a Giveaway with TWO LUCKY WINNERS!
Prize Package (one set for each winner):
- Mandy K Designs Princess Party Dress Pattern (Digital PDF)
- Stitchwerx Designs S138 Bonnet/S139 Cape Patterns (Digital PDFs)
- Your choice: Customized Set of 3 Ice Princess Wall Art or a 3′ x 4′ Frozen Photo Backdrop from Artful Life Designs
- $25 Gift Card from the Fabric Store of Your Choice
The Contest Rules:
- You must be 18 to enter.
- You can gain entries by entering the Rafflecopter Prompts.
- Giveaway ends: 9/14/2014 at 11:59 p.m. EDT
- Two winners will be chosen and announced on 9/15/2014.
Thanks for stopping by and getting “Frozen Inspired” with Stitchwerx Designs and Mandy K Designs!
 Don’t miss Part Two in our series which will be live tomorrow:
Frozen Inspired Part Two-Ice Princess Elsa Dress.
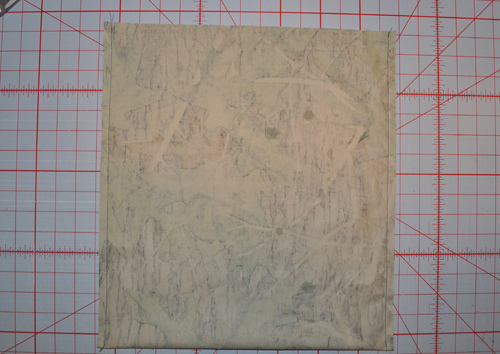
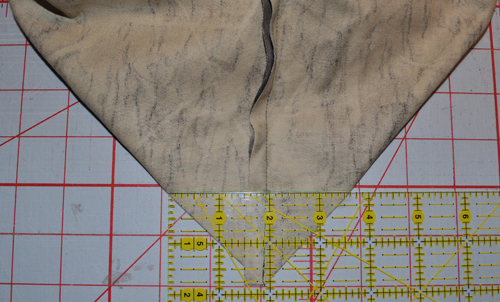
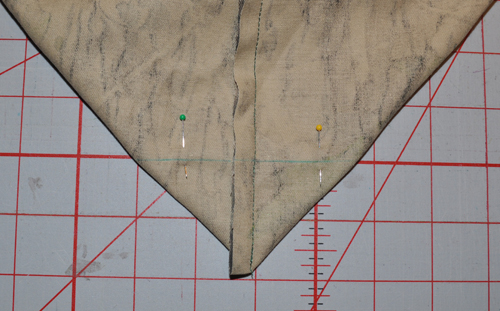

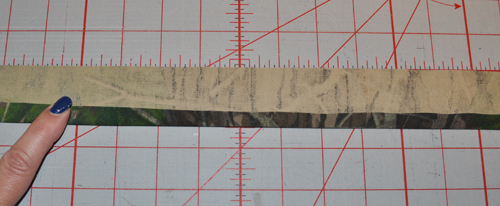
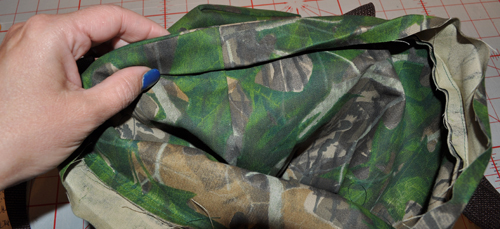
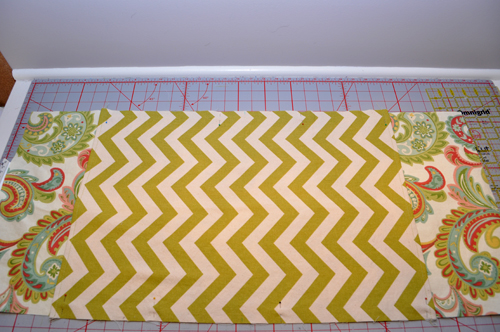
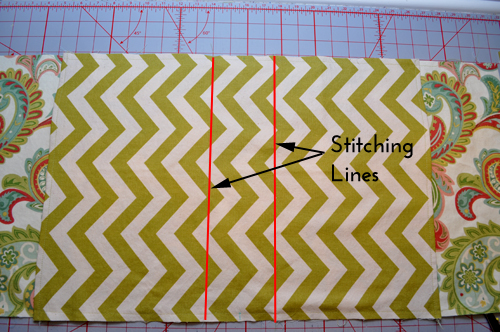
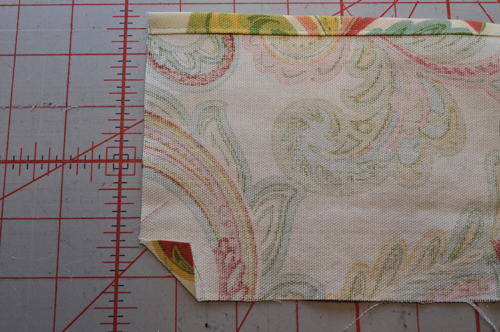
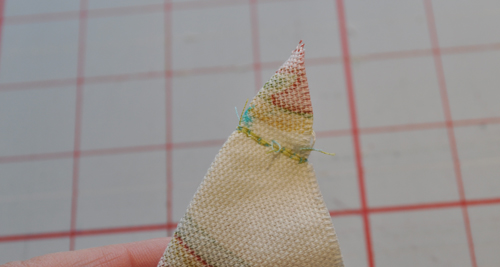
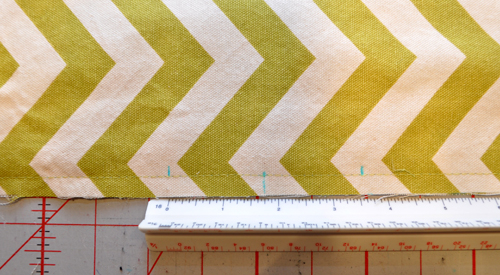 Lay your fabric out flat and measure 1.75″ from each side of the bottom center mark. Draw lines with a fabric marker. Stitch across on these lines.